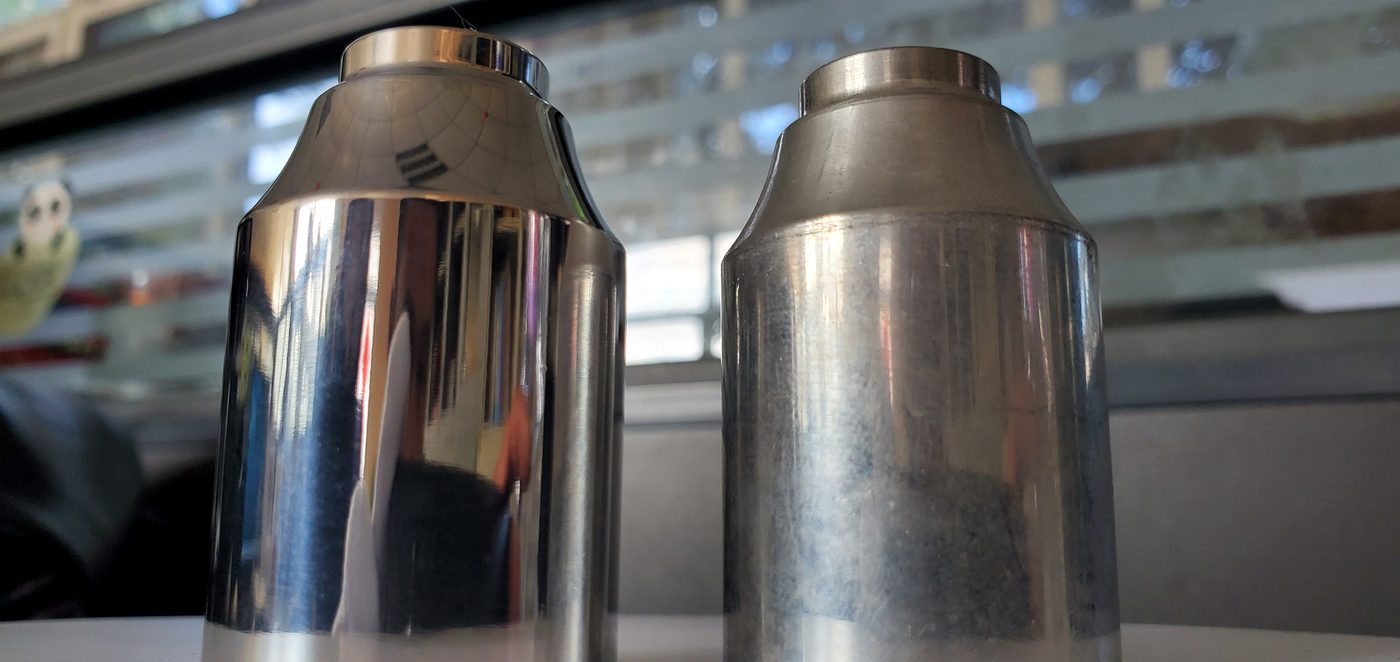
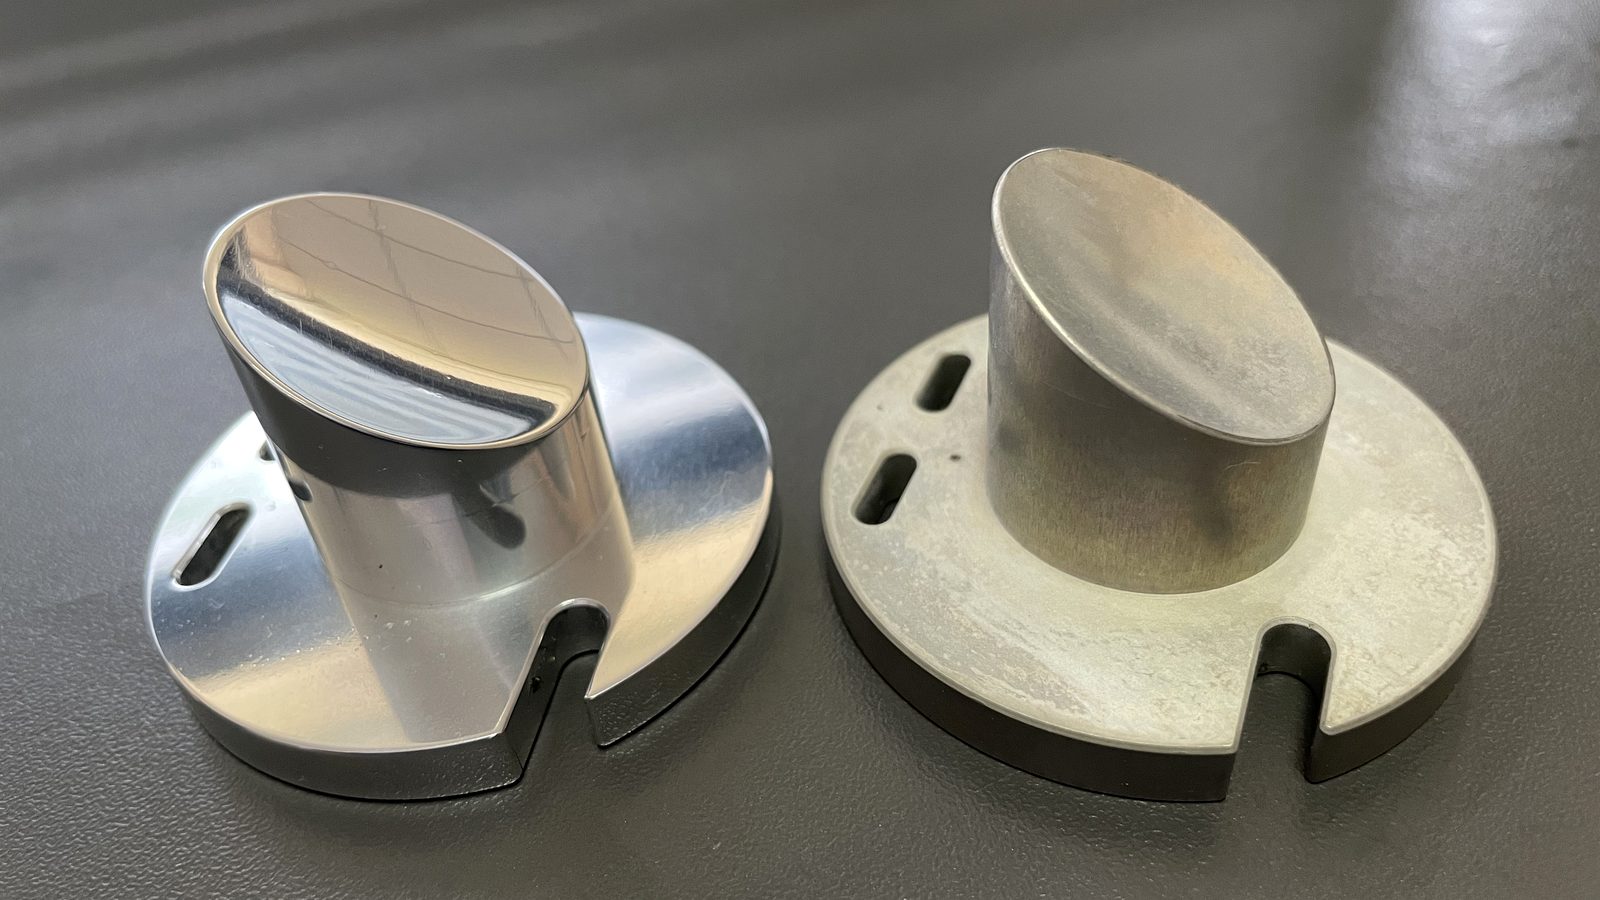
How to Polish Concave Aluminum Parts Without Cloudy Surfaces or Edge Rounding
Concave aluminum parts are difficult to polish in batch production because the curved recess does not receive the same media contact as flat surfaces. One area may become bright, while the inner curve stays cloudy, matte, or slightly scratched. If the process is made more aggressive, the edges may become rounded before the concave surface is fully corrected.
This is a common problem on aluminum housings, decorative fittings, motorcycle parts, lighting components, hardware parts, and curved CNC or die-cast parts. The solution is not simply “run longer.” The process must balance media access, cutting strength, part protection, compound control, and final brightening.
Why Concave Aluminum Surfaces Are Hard to Finish
In mass finishing, media removes burrs and improves surfaces through repeated sliding, rolling, and impact contact. Flat outer surfaces receive media contact easily. Concave surfaces are different: media may bridge over the recess, contact only the rim, or move through the curve without enough pressure.
This creates a typical production conflict: the outside edge and rim are finished too quickly, but the inner curved surface still looks dull. If the operator extends the cycle time, the edge may lose definition before the recess becomes bright.
First Diagnose the Surface Problem
Before changing media or machine settings, inspect where the defect appears. A cloudy concave surface can come from different causes, and each cause needs a different correction.
| Symptom | Likely Cause | What to Check | Recommended Adjustment |
|---|---|---|---|
| Concave area is cloudy, rim is bright | Media contact is concentrated on the edge | Media size, part orientation, recess depth | Try smaller or better-shaped media that can enter the curve more evenly |
| Edges are rounded before the inner surface improves | Cycle time or cutting strength is too high | Edge radius, processing time, media aggressiveness | Reduce cutting stage time and separate smoothing from polishing |
| Surface has gray film after finishing | Aluminum fines, unsuitable compound, dirty water | Water clarity, compound type, media cleanliness | Improve rinsing and use aluminum-safe finishing compound |
| Bright finish is uneven from part to part | Parts are shielding each other or loading is too dense | Part-to-media ratio, batch size, part nesting | Reduce loading density and prevent parts from stacking in the bowl |
| Small scratches remain inside the curve | Media is too coarse or previous machining marks are deep | Initial surface roughness, media grade, polishing sequence | Add a finer finishing stage before final bright polishing |
Choose Media by Geometry, Not Only by Material
Aluminum is soft, so plastic media is often safer when visible surfaces must be protected. But for concave parts, media shape and size can be more important than media material alone.
If the media is too large, it may only polish the rim and outer surface. If it is too small, it may not create enough pressure or may become difficult to separate. Cone, pyramid, angle-cut, or rounded media should be tested against the actual curve, slot, hole, and edge design of the part.
Ceramic media may be useful for the first smoothing stage when machining marks or casting texture are heavy, but it must be controlled carefully on decorative aluminum surfaces. For bright finishing, a gentler stage may be needed after the cutting stage.
Do Not Solve Every Problem by Extending Cycle Time
Extending cycle time is one of the most common mistakes when concave surfaces do not become bright. It may improve the recess slightly, but it also increases edge rounding, part-on-part contact, media wear, and surface inconsistency.
A better approach is to adjust contact quality. That may mean changing media shape, lowering batch load, improving liquid flow, or using a two-step process. For many aluminum parts, the first stage should remove marks and smooth the surface; the second stage should refine brightness without excessive cutting.
Control Part Loading and Nesting
Concave parts can nest together during finishing. When parts stack or shield each other, some surfaces receive little media contact while exposed edges receive too much. This is especially common with cup-shaped, cap-shaped, and curved aluminum parts.
If nesting happens, reduce the batch size, increase media support, or test a different machine motion. A standard vibratory finishing machine works well for many aluminum parts, but long, fragile, or easily nested parts may need controlled loading or a different finishing setup.
Use Compound to Keep Aluminum Clean
Aluminum fines can make the surface look gray or cloudy after finishing. The right finishing compound helps suspend removed particles, reduce smut, improve lubrication, and keep the surface cleaner during wet processing.
If the water turns dark quickly or parts look gray after rinsing, check compound concentration, water flow, media cleanliness, and whether the process liquid is being replaced often enough. A cloudy surface is not always a polishing problem; sometimes it is a cleaning and chemistry problem.
When to Use a Two-Stage Process
A single process may not be enough when the part has machining marks, a concave curve, and a bright appearance requirement. In that case, separating the work into two stages is more stable.
- Stage 1: controlled smoothing to reduce machining marks, burrs, and roughness without excessive edge loss.
- Stage 2: finer finishing or polishing to improve brightness and surface uniformity.
- Final check: inspect the concave area, rim, slots, holes, and any visible edge under consistent lighting.
If water marks appear after the wet stage, add or improve the drying step. For bright aluminum parts, quick rinsing and controlled drying can be as important as media selection. Industrial dryers may help keep the final surface consistent.
Common Mistakes to Avoid
- Using a strong cutting media because the concave area is still cloudy.
- Increasing cycle time until the rim becomes rounded.
- Choosing media only by aluminum material, without checking recess depth and curve radius.
- Loading too many parts so concave surfaces shield each other.
- Ignoring dirty water, aluminum fines, and compound residue when diagnosing cloudy surfaces.
- Expecting one process to remove rough marks and create a bright finish at the same time.
Related Solutions
If you are building a stable process for concave aluminum parts, these pages may help you compare suitable machines, media, compounds, and drying equipment:
Need a Polishing Test for Concave Aluminum Parts?
Send us your aluminum part photos, alloy, concave depth, edge requirements, current surface condition, and target finish. JINTAIJIN can help review whether the process should use plastic media, ceramic media, a two-stage polishing route, or a different loading method.
Contact our finishing team for concave aluminum polishing support
 +86-592-2381506


 Rete IPv6 supportata